EPOXY STICK
INTRODUCTION
Sealxpert Repair & Rebuilding system is a cost-effective epoxy resin based products with filler material designed for repair and maintenance applications. These applications offer solutions to problems cause by wear, abrasion, erosion, cavitation, chemical attacks, corrosion and mechanical damages such as shaft repairs, keyway repairs, metal surface repairs, heat exchange repairs, pump housing repairs, impeller repairs, etc. The products include:
- Seal Stic Quick Cure Epoxy Sticks
- Sealxpert Repair Putties
- Sealxpert Repair Liquids
- Sealxpert Ceramic Based Coatings
Sealxpert Ceramic Based Coatings
The use of Sealxpert Repair & Rebuilding System provides:
- High Adhesions
- Excellent vibration resistance
- Good abrasion resistance
- Diversity of use
- Withstand high operating temperature
- Good alkali and acid resistance
- Reinforce and strengthen after repair
- Durable and permanent repair
- Ease of application
DESCRIPTION OF MATERIALS AND ACCESSORIES
SS102 Seal Stic Quick Cure Epoxy Stick consists of two components packed in one tube. When the epoxy stick is mixed by hand as directed, there is a slight progressive heat rise up to the point of desired consistency for use.
The mixed epoxy stick mixed is more viscous than PS102 Steel Repair Putty and is generally used to fill cracks and crevices, heavy pitted areas and indentations. This product is recommended for us in filling cracks and material build-up for a small area. If the surface areato fill cracks and material build-up is large, Seaxlpert repair putties are recommended.
PRODUCTS STORAGE CONDITIONS
Products should be stored in a cool and dry location in unopened containers at 8 to 28°C. Storage life decreases with increasing storage temperature. Avoid exposure to heat sources such as direct sunlight or steam pipes. To avoid contamination of product with water, do not store outdoors. Keep sealed to prevent moisture pickup and monomer loss.
GENERAL CONDITIONS TO NOTE
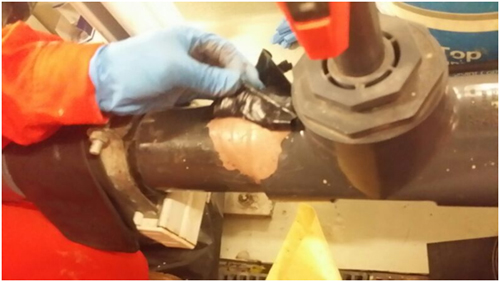
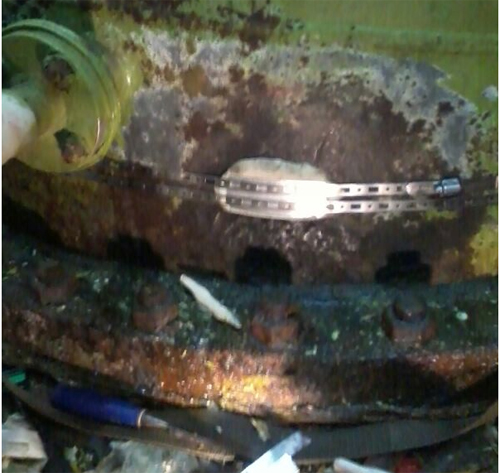
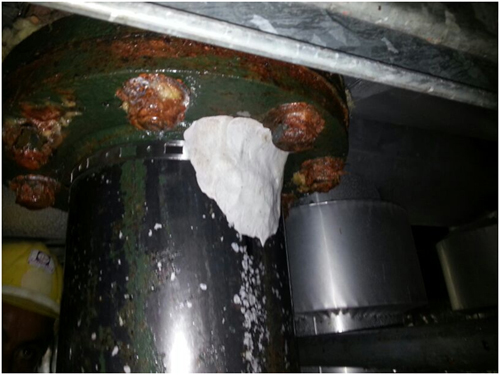
Seal Stic is a quick cure hand-mouldable epoxy stick with industrial strength. Seal Stic fills holes and cracks, bonds onto any metal or non-metal surfaces and repairs almost everything.
Seal Stic is a two-component product that has average working time of approximately 10 minutes. The product is hand-mixable and should be kneaded to a uniform colour. The longer the mixing time, the harder the product will become as it starts to cure. Different level of hardness may be required for different applications.
SS102 Steel Seal Stic Quick Cure Epoxy Stick is a general purpose hand mouldable repair stick. Simply cut off an appropriate section, knead and apply to damaged surface and it will cure in 20 minutes.
SS106 Underwater Seal Stic Quick Cure Epoxy Stick is a putty-like material that works on both wet and dry surfaces. The products cures underwater and therefore it is ideal for plumbing, irrigation and marine applications because it is unaffected by chlorinated or salt water. It is hand kneadable and fully cures in 20 minutes.
CURING TIME
Epoxy Stick compounds begin to cure and harden when the hardener is added to the resin. Epoxy putties and epoxy sticks cures by an exothermic chemical reaction which give off heat in the process. It is important to take note of the following details when working with epoxy based repair putties and repair liquids:
Curing times of epoxy putties and epoxy sticks are dependent on mixing volume. The larger the mass that is being mixed, the faster will be the curing time. If the mixed epoxy stick cannot be applied during the working time specified on the product label, it is necessary to mix them in smaller batches.
Epoxy putty and epoxy sticks curing times are temperature dependent. The higher the ambient temperatures and substrate surface temperatures, the faster the mixed product will cure. The ideal mixing temperature of epoxy putties and epoxy sticks are between 15°C (55°F) and 30°C (86°F). When mixing 500 grams of repair putties and epoxy sticks, applying onto a substrate surface with 6mm thick coating, it will take approximately 1 to 2 hours for the applied putty to obtain tack-free curing at ambient temperature of 30°C.
If the application is to occur at higher temperatures, the product should be stored at room temperature or slightly below to slow down the chemical reaction between resin and hardener.
USE OF EXTERNAL HEAT
A fast cure may be obtained by heating with infra-red bulbs, heating pads, electric heater or open flame held close to the repair area. Any type of extra heat will increase the curing speed of epoxies and putties.
At lower temperatures, the epoxy putties, epoxy liquids and epoxy sticks will cure very slowly or may fail to cure at all. To speed up the curing process at low temperatures (e.g. less than 5°C), store product at room temperature and heat parts to be repaired prior to application. The repaired area can also be heated with a heat gun upon completion of the application. However it is necessary to move the air gun around the repaired area at a distance of at least 300mm (1 feet) away from the substrate surface so as not to burn the applied epoxy coatings (epoxy putties, epoxy liquids and epoxy sticks).
POT OR WORKING LIFE
The pot life or working life of epoxy putties and epoxy sticks may be extended by pouring the contents into large surface area shallow container. The pot life can also be extended when putting the shallow container on ice or in cold water.
VISCOSITY CHANGES
Viscosity of epoxy putties and epoxy sticks increases with lower temperature and decreases with higher temperature. To change viscosity in cool weather, warm the products slightly; to reduce the viscosity in hot weather, cool the product slightly.
APPLICATION TIPS
Mixing of Epoxy Resins & Hardeners
When mixing epoxy putties and epoxy sticks resins & hardeners, stir the mixture constantly while scrapping the walls and bottom of the container. Do not fold the epoxies when mixing, as this will cause air entrapment to form thereby weakening the repair putty structure after it is cured. Do not reuse any left-over mixed container or pour new sets of resin & activator into previously mixed cans. When mixing several sets of epoxy into a mixing container, ensure that all resin and hardener from are drained out completely from their containers.
Pouring of Liquid Epoxy into Moulds
When pouring epoxy putties and liquid epoxies into a mould, avoid air entrapment in cured epoxies by pouring close to the mould in a steady and even stream. The maximum height of each pour of liquid epoxy should be up to 55mm thickness. If a thicker pour is required, pour a second layer after the initial layer has been cured tack-free.
Removing Air Entrapments in Liquid Epoxies
When the liquid epoxy is poured over a prepared surface, air entrapment by using a heat gun (do not use an open flame) to pull air bubbles out of cast epoxy. Swing the heat gun approximately 300mm (1 feet) away from the epoxy surface. Do not point the heat gun to close or rest at a fixed position as this will burn the epoxy surface. Heat will cause bubbles to rise to the top of the epoxy and dissipate.
Maximum Adhesion with Substrates
For maximum bond of epoxy with the substrate, precoat the application surface by rubbing the mixed epoxy into the substrate or using spatula to press the mixed epoxy onto the surface of substrate. This technique known as “surface wet out” helps the epoxy repair material fill all the crevices in the application surface, creating a superior bond between the epoxy and substrate. The rest of the mixed epoxy can then be applied over the pre-coat to finish the application.
Maximum Application Thickness of Epoxy Putty
The application thickness for each coating of epoxy putty is about 6mm. If a thicker coat is required, perform a second coating after the first coat has been cured tack-free.
Surface Application Temperature of Epoxy Putty
When applying epoxy putties and epoxy sticks onto a high temperature surface, always reduce the application surface temperature whenever possible. When applying epoxy putties onto high temperature surfaces, do not apply thick coating layers as this will cause the epoxy putty and epoxy stick to crack. Apply thin layers approximately 1mm to 2mm thick and work quickly as high temperature surfaces reduces epoxy working times.
Create Smooth Surface Finishes
Creating a smooth finish by smoothing out the uncured epoxy finish with a warm trowel for a smooth, glossy finish. A heat gun can also be used to create a smooth finish.
PRECAUTIONS
Epoxy putties and epoxy sticks contain ammonia and may irritate sensitive skin. Use in well-ventilated area. The vapours are harmful. Do not get the material in the eyes, on the skin, or on the clothing. The precaution in handlings the activator is similar to those for handling strong alkalis.Wash hands with soap and water after use. In case of eye contact, flush with plenty of water and seek immediate medical attention. Product may be harmful if swallowed. Keep out of reach of children. Refer to MSDS for more information.
Most epoxy putties and epoxy sticks are skin and eye irritants, and many epoxy hardeners are corrosive. Always wear appropriate gloves and goggles or face shield during mixing and handling. Observe good industrial safety practices, and review product Material Safety Data Sheet (MSDS) prior to use for complete precautionary information.
SURFACE PREPARATION& CLEANING OF SURFACES
Ensure that the surface is dry and stop all liquid leakage whenever possible. Remove all dirt, old paint coatings, rust, and other contaminates by abrasive blasting or other suitable mechanical techniques.
Provide a profile by abrasive blasting or other mechanical means.
Clean and degrease the surface thoroughly using solvent-based cleaner °reaser. Areas that are immersed in oil must be cleaned repeatedly to draw the oil out of the surface. Use a hot air gun or compressed air gun to force oil out of the pores. Allow the surface to cool, then degrease again.
After cleaning, roughen the surface to produce a good anchor profile of 60 to 80 microns.The best choice of surface profile preparation is to perform abrasive grit blasting (to surface preparation standards SA 2.5, SSPC SP10 or NACE No. 2) with an angular grit such as aluminum oxide or silicon carbide medium grit. Round abrasive grit should not be used. Alternatively high velocity water blasting with an abrasive medium is also recommended.


